REVIEW · NARA DAY TRIPS
Single- & multi-day Adventures within Kyoto Nara Osaka Kobe
Book on Viator →Operated by Kyosako Private Tours Japan · Bookable on Viator
Four days, four cities, one private ride.
This is an efficient way to cover Kyoto, Nara, Osaka, and Kobe without the stress of train hops and luggage juggling. You get a private vehicle for your group, plus Wi‑Fi and charging power onboard, which makes the whole day run smoother and easier.
I love the flexibility: you can shape the plan by preferences and suggestions, and you can choose one to four days. I also like the group setup—up to eight people in a private tour means you’re not stuck moving at anyone else’s pace.
One possible drawback is that the schedule is packed, and admission tickets are not included for most stops. Add in the note that there’s no restroom on board, and you’ll want to plan for frequent breaks.
In This Review
- Key things that make this tour worth your attention
- Why a private Kyoto–Nara–Osaka–Kobe day beats shared buses
- Price and value: $385 per group, up to 8 people
- Your private vehicle, Wi‑Fi, and flexible routing (the real comfort wins)
- A tip for smooth pickup times
- Day 1 in Kyoto: Amanohashidate, seaside villages, Arashiyama, and the temple big hits
- Day 1 reality check
- Day 2 in Osaka: castle grandeur, ramen-cup nostalgia, and market-to-neon energy
- Day 2 reality check
- Day 3 in Nara and Uji: deer pressure, Todai‑ji scale, then tea country
- Day 3 reality check
- Day 4 in Kobe: mountains, sake districts, earthquake memory, and Himeji Castle
- Day 4 reality check
- What to budget for: admission fees and timing on “included/free” stops
- Who should book this private multi-city program
- Should you book Kyosako Private Tours Japan?
- FAQ
- What cities are included in this private tour?
- How long is the tour?
- How many people are in a group?
- Does the tour include pickup and drop-off?
- Is Wi‑Fi available during the drive?
- Are admission and entrance fees included?
- What’s the cancellation policy?
Key things that make this tour worth your attention
- Private car for your whole group: no waiting on strangers, and your stops can match your energy level
- Wi‑Fi plus 100V charging: maps, messaging, and device power during the drive
- Multi-city, flexible durations: cover Kyoto, Nara, Osaka, and Kobe in 1 to 4 days
- Temple + food + views mix: gold-and-silver pavilion, Gion, Nishiki/Kuromon, plus lookout spots
- Sake and onsen options in Kobe: breweries, earthquake memorial, and hot spring time
- Most entry fees are on you: budget for temples, gardens, museums, and special attractions
Why a private Kyoto–Nara–Osaka–Kobe day beats shared buses
The big win here is simple: you’re not fighting transit between cities. Instead of piecing together trains, buses, and transfers, you ride together in an air-conditioned vehicle built for sightseeing days.
That matters especially because the tour spans four different areas. Kyoto alone includes classic temple zones plus food streets, then you shift to Nara for the deer-and-daibutsu day, Osaka for markets and neon, and Kobe for mountain views, sake districts, and earthquake history.
Also, this is a private setup for up to eight people. If you’re traveling as a family, a small group of friends, or even two couples, it often works out to far better value than buying multiple individual transport tickets plus “group tour” add-ons.
You can also read our reviews of more tours and experiences in Kyoto.
Price and value: $385 per group, up to 8 people
The listed price is $385 per group (up to 8). If your booking covers the full “about 4 days” range, that turns into a surprisingly low cost per person when you split it—but only if you actually fill the group capacity.
Even if you don’t fill all eight seats, you’re still buying something you can’t easily price: time and stress. A multi-city itinerary like Kyoto → Nara → Osaka → Kobe is exactly where shared tours can feel rigid. Private transport lets you keep momentum while still shifting the day when you want.
One more value angle: the car includes Wi‑Fi and 100V AC power. That’s not just comfort. It helps you handle tickets, translation, last-minute route tweaks, and keeping your camera/phone ready for temple photos and market snacks.
Your private vehicle, Wi‑Fi, and flexible routing (the real comfort wins)
You’re traveling in an air-conditioned vehicle with pickup and drop-off at hotels, the airport, and other locations you choose. The tour also offers a flexible itinerary you can change based on your preferences and what your guide suggests.
On top of that, the car has Wi‑Fi access and 100V AC power supply for charging devices like laptops and cameras. If you’ve ever run down your battery halfway through a day of photo stops, you’ll appreciate this more than you expect.
There’s one practical note to keep in mind: restroom is not listed as available on board. So even with a private ride, you’ll want to use restroom breaks during stops and not assume there’s an option during transit.
A tip for smooth pickup times
One of the most common points of friction in private tours is pickup timing. In the feedback tied to this operator, there’s an example of a pickup mismatch—an agreed early pickup time versus an arrival later due to oversleeping—followed by a dispute about the refund. The takeaway is easy: confirm your pickup time clearly, set an alarm, and be ready early. If you’re delayed, message right away.
Day 1 in Kyoto: Amanohashidate, seaside villages, Arashiyama, and the temple big hits
Day 1 is a “Kyoto classics plus outer sights” day, and it starts far north of central Kyoto. The pattern is: scenic nature first, then Kyoto’s major temple neighborhoods, then late-day energy with food and shrines.
Stop 1: Amanohashidate (about 2 hours)
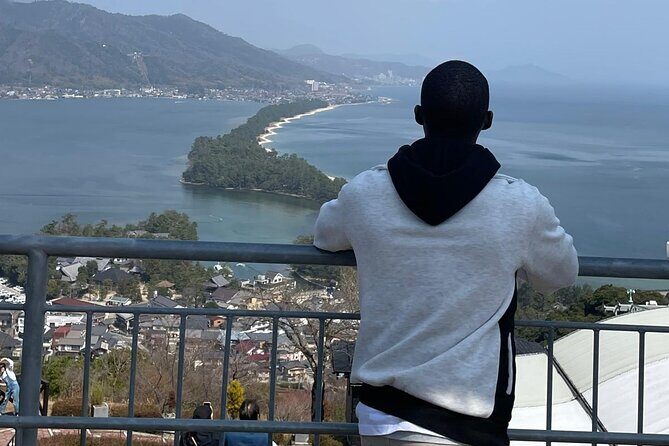
This natural stretch of pine-covered sandbar connects the two sides of Miyazu Bay. It’s named for the idea of a bridge in heaven. Admission isn’t included here, so plan that cost if you want to do the formal viewing options.
Stop 2: Ine no Funaya (about 1 hour)
This seaside fishing village is known for its funaya boathouses lining the bay. The area is also tied to the Urashima Taro folk tale through Urashima shrine. This stop is one of those “Japan looks like a postcard because it really is” moments.
Stop 3: Arashiyama (about 2 hours)
Arashiyama is a western Kyoto district with roots back to the Heian period. Expect a popular, walkable sightseeing area, with the tour time set aside for strolling and taking in the famous vibe of the district.
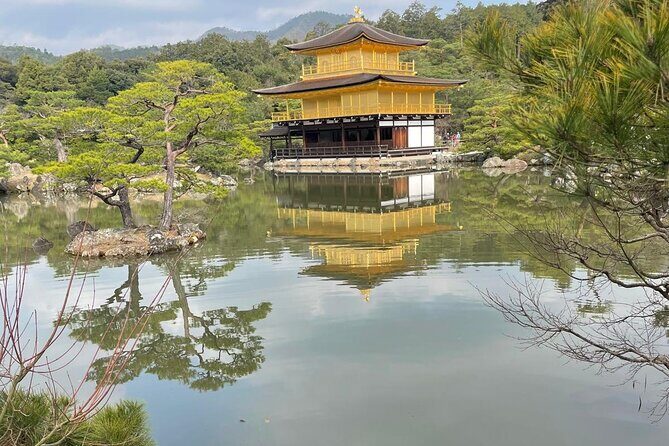
Stop 4: Kinkakuji (Golden Pavilion) (about 30 minutes)
This Zen temple is famed for the Golden Pavilion style and its views over a large pond. It’s also noted as the only remaining building connected to Yoshimitsu’s former retirement villa—so there’s a sense of survival-through-time here.
Stop 5: Nijo Castle (about 1 hour)
A former imperial villa now recognized as a World Heritage site. It’s tied to the rise and fall of the Tokugawa clan and other major political events.
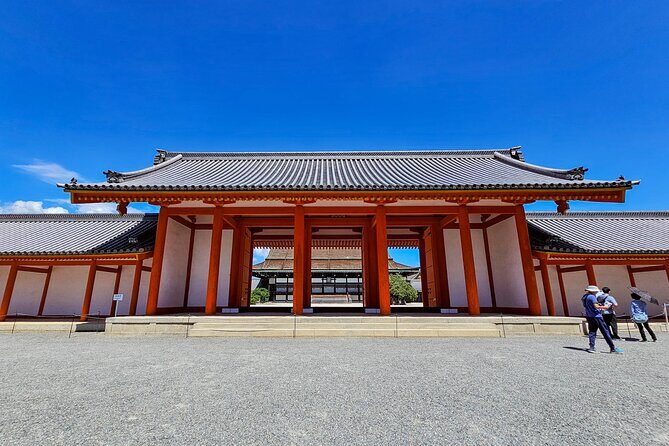
Stop 6: Kyoto Imperial Palace (Kyoto Gosho) (about 1 hour)
This used to be the residence of Japan’s Imperial Family until 1868, when the capital moved to Tokyo. You get a strong “Kyoto as the former center of power” perspective without it feeling like only museum time.
Stops 7 and 8: Nishiki Market and Ginkakuji
- Nishiki Market (about 45 minutes) is the “Kyoto kitchen,” a narrow food street with shops and restaurants. This is great for sampling in small amounts while you walk.
- Ginkakuji (Silver Pavilion) (about 45 minutes) is a Zen temple on the eastern side of Kyoto. It’s modeled after Ashikaga-era retirement villa ideas, which gives it a different feel from the flashy Kinkakuji contrast.
Stop 9: Nanzen-ji (about 1 hour)
A well-known Rinzai Zen temple surrounded by mountains. The tour framing highlights temple halls and gardens centered around a pond, which tends to be a calmer break between busier streets.
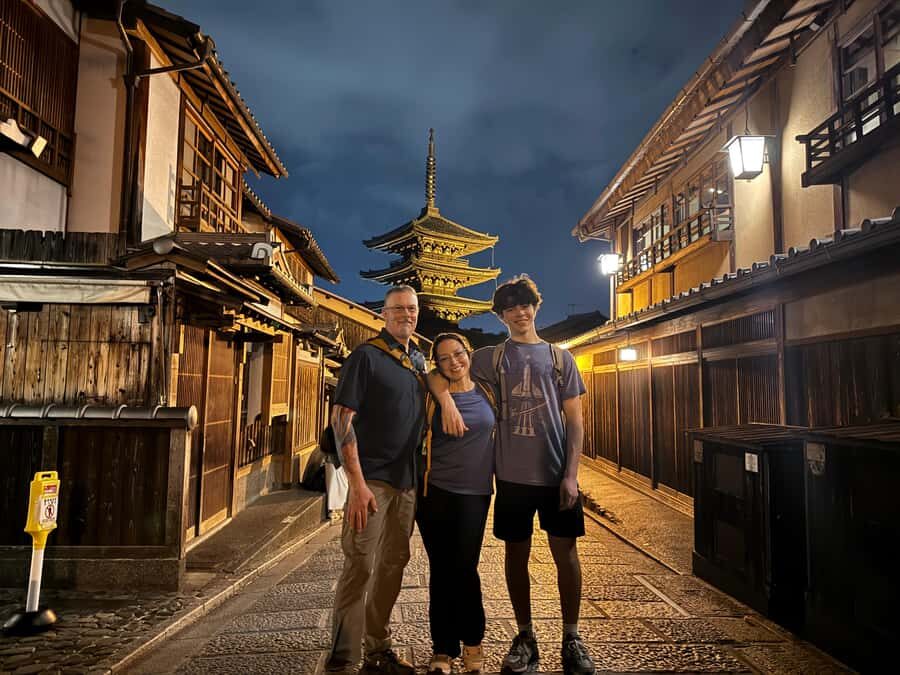
Stop 10: Gion (about 2 hours)
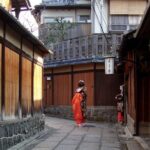
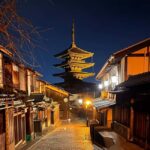
Geisha district time, with a long history vibe. The tour notes Yasaka jinja as a highlight here, including vermilion-gate imagery. Plan to walk slowly; Gion is all about atmosphere.
Stop 11: Sanjusangendo (about 1 hour)
This is the famous hall with 1001 statues of Kannon. Established in 1164 and modified later, it’s the kind of stop where scale hits you fast.
Stop 12: Fushimi Inari-taisha (about 30 minutes)
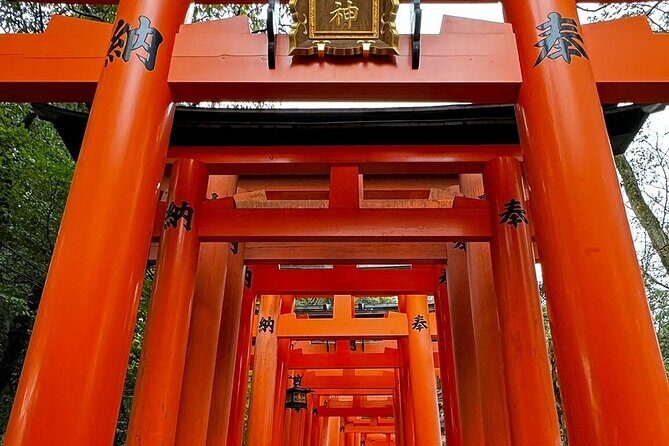
A shrine with around 1300 years of gathering history since 711 AD. People come for harvests, business prosperity, home safety, and all kinds of wishes. If you love shrines, this one is a must—just keep your expectations realistic: it’s short here, so you’ll want to move with purpose.
Stop 13: Hozugawa River boat ride / rafting-style experience end point (about 2 hours)
The description focuses on hands-on nature, excitement, and scenic beauty. Admission isn’t included, so check what you’ll need to pay on the day.
Stops 14 and 15: Kyotango beaches and Amanohashidate winery
- Kyotango (about 2 hours) includes long beaches like Shotenkyo Beach and Kotohiki-hama, also called singing sand beach.
- Amanohashidate Winery (about 2 hours) is described as a more relaxed, nature-and-winemaking experience, and it’s listed as free for admission in the day plan.
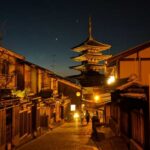
Day 1 reality check
This day is long on paper because it mixes far-north nature, western Kyoto temple zones, and eastern Kyoto shrines in one run. The private car helps you handle the geography, but it’s still a full day. If you want a “soak in Kyoto slowly” trip, you might consider trimming stops and leaning on the flexible itinerary option.
Day 2 in Osaka: castle grandeur, ramen-cup nostalgia, and market-to-neon energy
Osaka Day 2 flips the tone: less “ancient halls” and more “food, fun districts, and big-city sights.” You’ll bounce between culture stops and shopping and eat-your-way moments.
Stop 1: Osaka Castle (about 1 hour)
A landmark with a five-story structure and strong visual impact. Admission isn’t included here.
Stop 2: CUP NOODLES MUSEUM OSAKA IKEDA (about 1 hour)
This focuses on ramen noodle cups and the huge number of instant ramen flavor variations. If you enjoy kitschy design and food stories, this can be a fun change of pace from temples.
Stop 3: Minoo Park (about 2 hours, free admission)
A natural area just outside Osaka, known for greenery and a tranquil vibe. The tour notes Minoosan Ryuanji Temple as well—so you get a light nature-and-temple combo without it becoming a hike-heavy day.
Stop 4: Shinsekai (about 1 hour)
A pre-war district later developed to resemble New York and Paris energy in Northern and Southern sections. Tsutenkaku is mentioned as a key landmark, which helps you orient.
Stop 5: Sennichimae Doguyasuji Shopping Street (about 30 minutes, free)
A compact street known for kitchenware—cutlery and crockery among other specialists. This is a good “one quick stop” area if you want practical souvenirs.
Stop 6: Kuromon Market (about 45 minutes, free)
One of Osaka’s well-known food markets. The tour description emphasizes fresh seafood, meat, and produce. Come hungry, but don’t overcommit—markets are great for sampling.
Stop 7: Hozenji Yokocho (about 45 minutes, free)
A narrow alley with preserved “old Japan” atmosphere: traditional lanterns and cobblestones, plus a small Buddhist temple visit.
Stop 8: Dotonbori (about 45 minutes, free)
Neon canal area energy with street food and nightlife vibe. The tour specifically calls out the famous Glico sign area.
Stop 9: Shinsaibashi-suji Shopping Street (about 1 hour, free)
A covered shopping street with a long history. This is where you can walk off market calories and still find snacks and shopping.
Stop 10: Sumiyoshi Taisha (about 1 hour, free)
A shrine dating back around 2,000 years, founded before Buddhism introduction. The tour notes Sumiyoshi-zukuri shrine architecture, which can be a useful anchor if you want to study style differences.
Stop 11: Tempozan Harbor Village (about 2 hours, aquarium not included)
A bay leisure zone, with Kaiyukan called out as the world’s largest aquarium. Admission isn’t included at least for some attractions, so budget if you plan to go inside.
Stop 12: Hoshi no Buranko Bridge (about 2 hours, free)
A suspension bridge viewpoint for panoramic views. The description highlights autumn scenery, but the main draw is the 360-degree sense of place.
Stop 13: Asahi Beer Museum (about 1 hour)
Sensory experience and beer tasting. Tours may be available, and the description frames it as a place to find what you like.
Stop 14: Tondabayasahi Jinai Street (very short stop)
A small historic district with preserved traditional townhouses from Edo to early Showa periods.
Day 2 reality check
This is a “choose your pace” day. If you love food and street energy, you’ll thrive. If you prefer a slower sightseeing style, ask your guide to trim shopping time while keeping the market and one or two standout districts.
Day 3 in Nara and Uji: deer pressure, Todai‑ji scale, then tea country
Day 3 balances major Nara sights with a quieter detour into Uji, which helps the day from feeling like one big crowd zone.
Stop 1: Nara Park (about 1 hour, free)
A large park area with free-roaming deer and famous temples. It’s an iconic scene, and it’s fast enough that you can enjoy it without turning it into a long sit-down day.
Stop 2: Todai‑ji Temple (about 1 hour)
Here’s the heavyweight: UNESCO World Heritage, with a giant bronze Buddha (Daibutsu) and the scale of one of the largest wooden buildings in the world. Admission isn’t included, so plan for tickets.
Stop 3: Higashimuki Shopping Street (about 30 minutes)
A covered arcade close to Nara Park. The tour description calls out a mochi pounding shop, which is the kind of stop that makes Nara feel lively rather than purely solemn.
Stop 4: Kofuku‑ji Temple (about 1 hour)
Dating back to the 7th century and described as an essential part of Nara temple highlights. Expect multiple pagodas, halls, and garden elements.
Stop 5: Sanjodori Street (about 1 hour, admission included)
The tour notes it as shopping and dining, connecting Gion-area vibe to the Kawaramachi side concept. This one reads like a built-in street-life break.
Stop 6: Isuien Garden (about 1 hour, admission included)
A traditional Japanese garden with a pond and teahouse, plus carefully landscaped design. This is a great pairing after temples because gardens give you a calmer pace.
Stop 7: Kasuga Grand Shrine (about 1 hour)
Famous for lanterns—hundreds of bronze lanterns donated by worshippers and stone lanterns along approaches. The shrine vibe is more textured here than in typical “quick photo” shrines.
Stop 8: Naramachi (about 30 minutes, admission included)
Old machiya merchant townhouses, small alleys, cute cafes and shops. If you want a “slow walk” portion without losing the tour momentum, this is that.
Stop 9: Uji (about 2 hours, free)
Uji is described as a southern Kyoto detour with terraced fields, hiking, and a tea-focus. This is where the day shifts from sightseeing crowds to a calmer tea-region feel.
Day 3 reality check
Nara can feel like a stampede at peak hours. Because your time at each stop is capped (often around an hour), you’ll likely be moving, not lingering. If you want more quiet time, use the flexible itinerary option and trade 10–20 minutes from the shopping arcades for extra garden or street walking.
Day 4 in Kobe: mountains, sake districts, earthquake memory, and Himeji Castle
Day 4 has big variety. You start with a mountain viewpoint area, move into sake and foreign merchant history, and then add Himeji Castle plus gardens and onsen options—so this feels like a Kobe-plus-day-trip program.
Stop 1: Mt. Rokko (about 2 hours, free)
The highest peak in the Rokko range (931 meters), a green backdrop to Kobe. The tour also mentions Kobe Nunobiki Herb Gardens as Japan’s largest—though the description is cut off, the point is clear: plants, views, and a mountain atmosphere.
Stop 2: Nada no Hitotsubi (about 1 hour)
A sake district described as famous due to rice, water, and weather conditions. This sets up the next stop with context: Kobe’s identity here is tied to brewing.
Stop 3: Kobe Shushinkan Brewery (about 1 hour)
Includes a shop selling sake and sake-related products, plus a restaurant combining Japanese cuisine with sake. The tour description also says free guided tours of the sake warehouse happen once per day—so time matters.
Stop 4: Port of Kobe Earthquake Memorial Park (about 1 hour, free)
A museum-focused stop on the Great Hanshin Awaji Earthquake (Jan 17, 1995 at 5:46 am). The description notes over 5,000 deaths and tens of thousands of destroyed homes. This is one of the most meaningful stops on the whole itinerary.
Stop 5: Kitano Ijinkan-gai (about 1 hour)
A foreign merchant and diplomat district shaped after the Port of Kobe opened to foreign trade in the late 19th century. The tour notes more than a dozen former houses.
Stop 6: Chinatown (Nankinmachi) (about 1 hour)
Developed by Chinese merchants who settled near the port after trade opened in 1868. The description notes the name adopted from Nanjing, and this stop usually delivers a very different food-and-street texture than the shrines and gardens earlier in the trip.
Stop 7: Kobe Harborland (about 1 hour, free)
A commercial and tourist complex with shopping and entertainment. It’s more modern and easy to browse.
Stop 8: Himeji Castle (about 1 hour)
White Heron Castle, described as Japan’s first UNESCO World Cultural Heritage site. This is a classic “if you love iconic castles, do not skip” stop, even if it feels like a detour from Kobe.
Stop 9: Koko‑en (about 1 hour, admission included)
One of Japan’s most beautiful gardens, listed as a national special scenic spot. The description highlights man-made lakes, bridges, and ancient buildings.
Stop 10: Arima Onsen (about 1 hour, free)
A famous hot spring resort. The tour notes enjoying a bath and also a hot spring footbath. For many people, this is the perfect “end-of-trip reset” after temple days.
Stop 11 and 12: Rokko Garden Terrace and Rokko‑Shidare Observatory
- Rokko Garden Terrace is described as an English garden with cottage- and meadow-style areas.
- Rokko‑Shidare Observatory is a tree-like dome observatory with panoramic views of Osaka Bay.
Day 4 reality check
This is the day with the most “power stops” per hour. It’s great for people who want variety and big-name sights. If you prefer slower sightseeing, the private nature of the tour is exactly what you should use to reduce the number of view-and-garden stops near the end.
What to budget for: admission fees and timing on “included/free” stops
The tour is clear that entrance fees and sightseeing tickets are not included in general. That means temple admissions, garden tickets, museum entry, and special attractions will likely cost extra depending on which stops you choose.
The good news: the plan labels some stops as free or with admission included. Examples from the day outline include Kyotango and Amanohashidate Winery (free labels on Day 1), Osaka-area nature and several street districts (free labels on Day 2), and some Nara/Uji stops where admission is included (like Sanjodori and Isuien Garden). On Day 4, Koko‑en is listed as admission included, and several view/onsen stops show as free.
So here’s the practical approach: treat the itinerary as a mix of included-fee and add-on-fee stops, and budget a daily “ticket buffer.” Your guide can help you decide what’s worth paying for if your schedule or interests change.
Also, since restroom isn’t on board, you’ll want a small “human logistics” mindset: use restrooms at stops and don’t assume every drive segment offers a quick option.
Who should book this private multi-city program
You’ll likely love this tour if you:
- Want a multi-city check-off without the stress of trains between Kyoto, Nara, Osaka, and Kobe
- Travel in a group of up to eight and want a private rhythm
- Appreciate onboard tech: Wi‑Fi and charging during long drives
- Like variety: temples, food streets, scenic viewpoints, sake, and one meaningful history stop
You might want to rethink it if:
- You get tired by very full days with many stops (Day 1 and Day 4 especially)
- You’d rather spend long unbroken time in one area than move daily across regions
- You’re counting on admission fees to all be included (they’re not, and many are marked as not included)
The overall participation note says most travelers can participate, and service animals are allowed. That’s a good sign for flexibility—just remember that it’s still a lot of walking and on-your-feet time at most stops.
Should you book Kyosako Private Tours Japan?
If you want maximum Japan per day with minimum logistics headache, this is the kind of private tour that fits. The standout value isn’t just the private car—it’s that the plan covers major places across Kyoto, Nara, Osaka, and Kobe while still letting you adjust the itinerary.
That packed schedule is the only real trade-off. Go for it if you like big sightseeing days and can handle frequent stop changes. If you prefer slow travel, treat the itinerary as a menu and ask your guide to cut back where needed.
One last practical hint: the tour’s quality shows in the high approval numbers (a 4.8 rating and 94% recommended are strong signals). For private touring, punctual communication matters. Be early at pickup, confirm times, and you’ll likely get the smooth day you’re paying for.
FAQ
What cities are included in this private tour?
The tour can cover Kyoto, Nara, Osaka, and Kobe. The description also notes a one-day option where pickup can be in one city and drop-off in another.
How long is the tour?
The tour is offered as 1 to 4 days, with this specific tour shown as about 4 days.
How many people are in a group?
It’s a private tour where only your group participates, and the group size is listed as up to 8.
Does the tour include pickup and drop-off?
Yes. Pickup and drop-off are offered at hotels, the airport, and other locations where you want.
Is Wi‑Fi available during the drive?
Yes. The vehicle includes Wi‑Fi on board for stable internet access during excursions.
Are admission and entrance fees included?
No. The tour notes that admission fees and sightseeing tickets are not included, with some specific stops labeled as free or admission included.
What’s the cancellation policy?
Free cancellation is offered if you cancel up to 24 hours in advance for a full refund. If you cancel less than 24 hours before the start time, you won’t receive a refund.