REVIEW · KIMONO RENTAL & PHOTOSHOOT
Kyoto Kiyomizudera Kimono Dressing with Hairstyle | Photoshoot
Book on Viator →Operated by Hakuu · Bookable on Viator
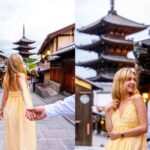
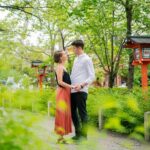
Kyoto wears well. This kimono-and-photo setup targets Kiyomizudera and Gion for easy, beautiful pictures. You pick from 700+ kimono styles and get expert help getting the fit right, with optional pro photos that focus on the classic streets and temple views.
The main trade-off: the photography isn’t automatic. The shoot requires a separate booking and it’s not guaranteed last-minute, plus you’ll need to plan around a same-day 5:00 PM return.
In This Review
- Key Highlights You’ll Actually Feel on the Day
- Picking a Kimono in Kyoto Without the Guesswork
- Hairstyle Option: Small Upgrade, Big Photo Difference
- The Photoshoot Rules That Affect Your Plan
- Your Guided Route: Gion and Kiyomizudera’s Best Photo Angles
- Stop 1: Gion
- Stop 2: Kiyomizu-dera Temple
- Stop 3: Kiyomizu-Zaka Street
- Stop 4: Hanamikoji Street
- Stop 5: Sannenzaka Ninenzaka
- Stop 6: Ishibe Alley
- How Many Photos You Get (And Why It Matters)
- Group Size, Timing, and What Makes the Logistics Feel Easier
- Where It Fits in Your Kyoto Day
- Price and Value: Why $127 Can Be Fair
- Who Should Book This (And Who Might Skip It)
- Should You Book This Kimono-and-Photoshoot Experience?
- FAQ
- Do I get the photoshoot automatically with the kimono rental?
- How many photos do I receive if I book the photoshoot?
- Where is the meeting point for the kimono experience?
- What is included with the $127 kimono experience?
- What is the return deadline for kimono items?
- Is kimono dressing allowed during pregnancy?
Key Highlights You’ll Actually Feel on the Day
- 700+ kimono choices (including men’s, children’s, and fusion options), so you’re not stuck with one look
- Expert dressing assistance plus complimentary tabi socks, which makes the whole thing easier than DIY rentals
- Guided photoshoot that’s exclusive to kimono clients, with up to 180 raw and 18 edited photos
- A tight photo route around Gion and Kiyomizudera, saving you the headache of figuring out where to shoot
- Small group size (max 50) and free baggage storage, so your day stays calmer
- Optional hairstyle upgrades (updos or braids) to match the kimono and look more finished in photos
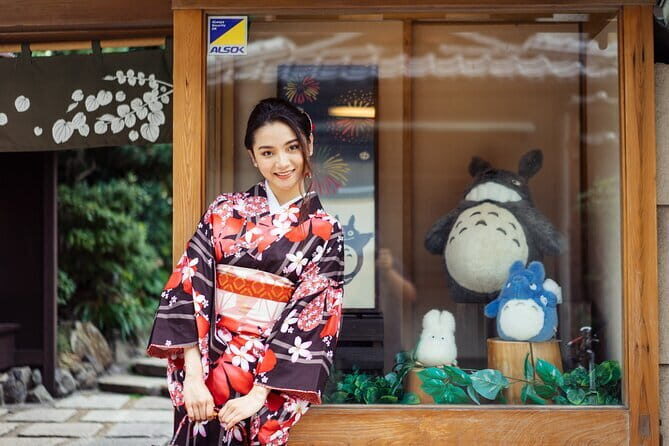
Picking a Kimono in Kyoto Without the Guesswork
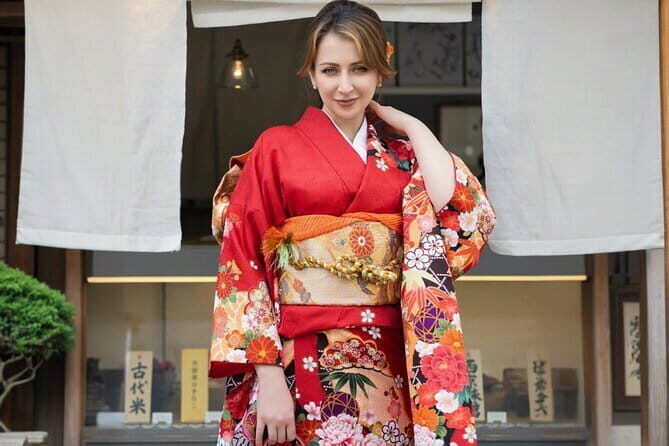
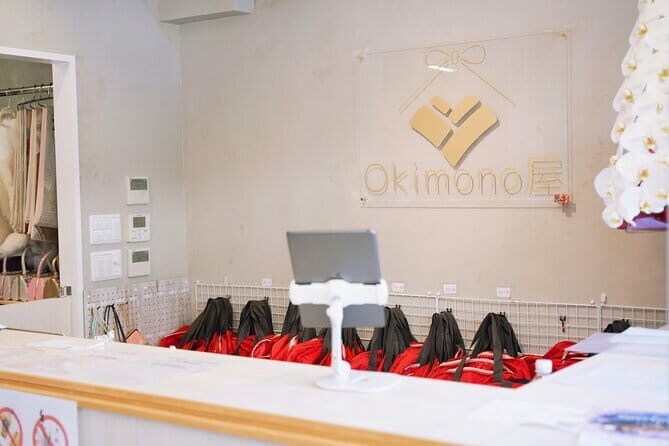
This experience is built around one simple idea: choose a kimono you’ll actually want to wear, then let someone else handle the fit and styling details. You start at Okimono屋-清水店 in Higashiyama, in an area that’s already close to the places people come to Kyoto for—especially Kiyomizudera Temple and Gion.
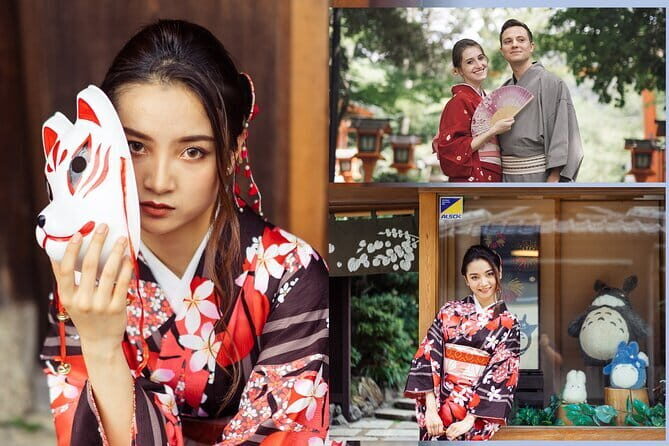
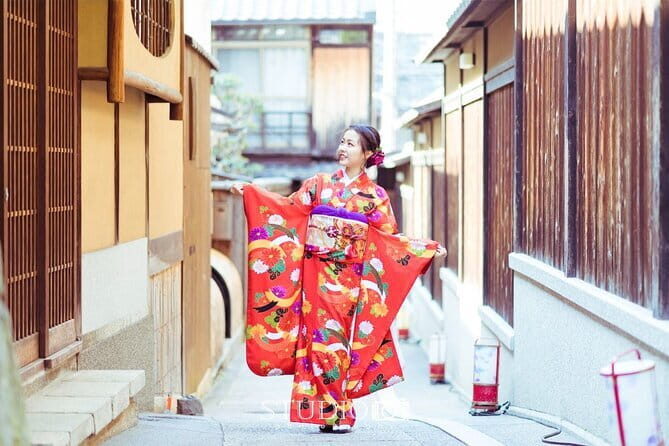
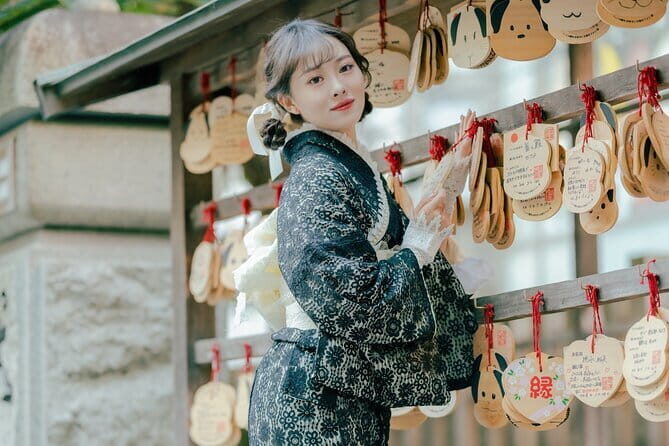
You’ll choose your kimono first. The selection is large—700+ options—which matters more than it sounds. When there are lots of choices, it becomes realistic to match a vibe: classic elegance, something more playful, or more modern styles (including a trending lace-kimono option). You also have gender and age coverage, with styles for men, children, and fusion looks.
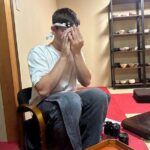
Then the shop team helps you get it right. They include tabi socks for the day, which is a small thing but a big help. Tabi are part of how kimono footwear works, and having them provided means you don’t have to hunt for them before you arrive.
A practical note: kimono dressing looks straightforward, but fit is what makes photos look polished. If you’re even slightly worried about feeling awkward, this is where the experience earns points—someone’s job is literally to get you comfortable and camera-ready.
You can also read our reviews of more photography tours in Kyoto

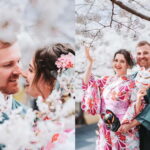
Hairstyle Option: Small Upgrade, Big Photo Difference
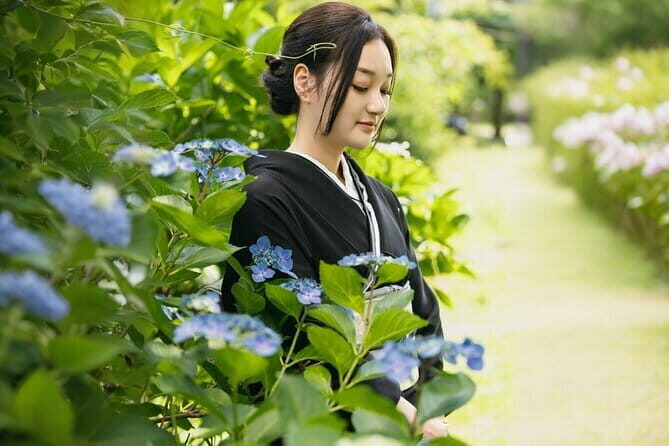
You can add hairstyle styling as an optional upgrade. The goal here is not just hair doing hair things; it’s alignment—kimono + hairstyle + accessories that read well in photos.
The service includes styling like intricate updos or braids, plus hair accessories. Even if you’re not sure what style goes with your kimono, having that upgrade available helps you avoid the most common problem: wearing the traditional outfit while your hair looks like you just stepped out of a modern train station.
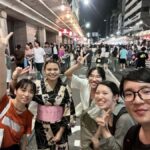
If you’re planning social media photos, I’d treat hairstyle as part of the “one-stop” value of the day. If you’re traveling with someone else and they’re getting styled, it also helps you look consistent in group photos.
The Photoshoot Rules That Affect Your Plan
The photoshoot is the headline add-on, but it comes with clear boundaries.
First: the photography session is offered exclusively to kimono rental/experience clients. So if you’re considering the shoot, plan for it as part of the kimono day, not as a separate plan you might tack on spontaneously.
Second: the rental experience and the photography service are booked separately. That means you’ll want to confirm what you’ve added to your booking so there are no surprises when you show up.
Third: advance booking is required for the photoshoot. Last-minute reservations (under 24 hours) are not guaranteed. If the photographer isn’t available, the provider will either issue a full refund or suggest an alternate shooting time. For this kind of experience—where your whole street route depends on timing—that matters.
Finally: the day has a return deadline. All items must be returned by 5:00 PM on the same day. Next-day return is available at no extra charge if you inform staff in advance, which is useful if you’re staying nearby and want to keep your day flexible.
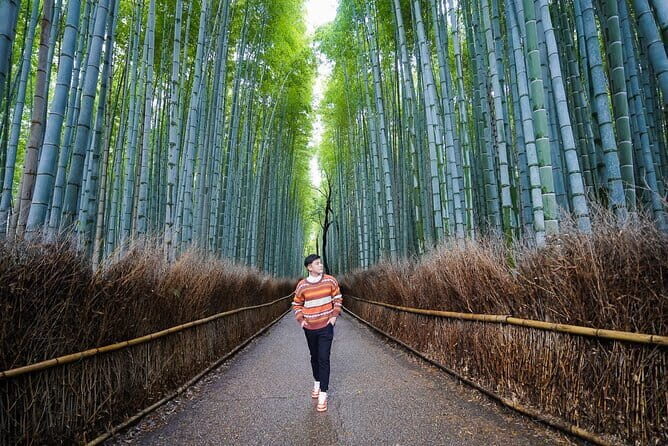
Your Guided Route: Gion and Kiyomizudera’s Best Photo Angles
The photoshoot route is designed to take you through Kyoto’s classic lanes around the big landmarks. You don’t just get a random walk—you get a set sequence that hits photo-friendly streets and viewpoints.
Here’s how the itinerary flows, stop by stop, and what each place tends to deliver in photos.
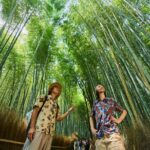
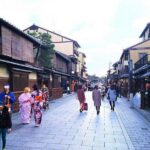
Stop 1: Gion
Gion is where Kyoto feels instantly recognizable. It’s also a strong place to start because it sets the atmosphere early, before you climb into the more temple-heavy areas.
In photos, Gion can look great with kimono because the streets and traditional vibe match the outfit instantly. The one thing to watch for is crowding. Around major sightseeing hours, expect other visitors to be in the frame—part of why having a guide matters, since they can help you time and position.


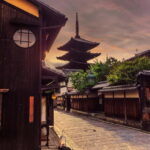


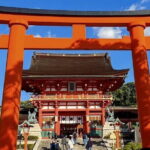
Stop 2: Kiyomizu-dera Temple
Next is Kiyomizudera Temple, one of Kyoto’s main icons. This stop is about scale and presence. Kimono looks especially good in front of major landmarks because your outfit becomes part of a wider Kyoto scene rather than just a close-up portrait.
The potential drawback is weather and lighting. If it’s overcast, images can come out soft and flattering. If it’s bright, you’ll want steady guidance so you don’t end up with harsh shadows on faces. Either way, the route is set up so the photographer can work with your placement.
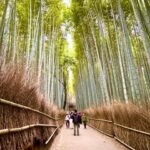
Stop 3: Kiyomizu-Zaka Street
From the temple area, you’ll move toward Kiyomizu-zaka Street—a classic approach with the kind of visual rhythm that photographs love. This is where your kimono can look more dramatic, because the slope and street details add motion and depth.
A practical consideration: stair-steep areas. Even if you’re not told to worry about it, you’re wearing a kimono, and walking can feel different than normal shoes. The earlier you let the dressing team set you up well, the easier this part becomes.
Stop 4: Hanamikoji Street
Hanamikoji Street is a great mid-route photo stop because it brings you back to that traditional Kyoto street look. It’s the kind of place where you can get shots that feel like Kyoto postcards—but with you as the focal point.
This stop also helps break up the walk. After temple sights and slope streets, a calmer lane can help you reset before the later photo segments.
Stop 5: Sannenzaka Ninenzaka
Then comes Sannenzaka Ninenzaka, the famous stepped streets. These lanes often look incredible with kimono because the outfit and the old-style streets share the same visual language.
The only caution is timing and traffic of people. If you get stuck in a crowded moment, you might not get the cleanest background. That’s where the photographer’s guidance becomes the real value: they’re working to get you the best workable moments, not just passing through.
Stop 6: Ishibe Alley
Finally, Ishibe Alley gives a more intimate, lane-style feel. This can be great for close-to-medium portraits where your kimono details (and hairstyle) matter.
This is also the stop where edited photos often look especially cohesive because you’ve already built a consistent look through the full route.
How Many Photos You Get (And Why It Matters)
The shoot includes a lot of images for the price, but what you really care about is the spread between raw and edited.
You can receive up to 180 raw photos and 18 edited shots. That structure is useful:
- Raw files help you choose your favorites and verify poses and timing.
- Edited images give you the polished set that’s ready for sharing right away.
If you’re trying to get one or two stand-out posts, the 18 edited photos are the ones to expect as your finished product. The raw set gives you options if you want variety—different angles, expressions, and street backdrops.
Group Size, Timing, and What Makes the Logistics Feel Easier
The experience runs for about 1 hour (approx.), and it ends back at the meeting point. The shop team also includes free baggage storage, which is underrated. If you’re hopping between Kyoto sights, you don’t want to haul bags while you’re dressed in kimono.
The group is capped at 50 travelers, which is a meaningful limit for a shop-based activity. Smaller groups usually mean less chaos while you’re getting dressed, and less waiting while staff handle multiple customers.
You’ll also get a mobile ticket, and confirmation is received at booking time. That helps if you’re juggling multiple activities during a single Kyoto day.
Where It Fits in Your Kyoto Day
This is best when you build your day around the area. Because the meeting point is near the sights you’ll photograph, it reduces travel time and keeps you from losing your kimono momentum to transit.
If you’re also planning to visit Yasaka Shrine, Ishibe Koji, or wander through nearby historic streets, having the kimono day cover the photos makes those walks feel more purposeful.
One smart approach: treat the kimono day as a “slow moment” rather than another sprint. The outfit is part of the experience. When you rush, the fit and photos suffer.
Price and Value: Why $127 Can Be Fair
At $127 for a 1-hour kimono dressing and hairstyle/photoshoot experience (with mobile ticket), it can feel like a lot—until you separate what’s included versus what’s added.
Here’s the key value breakdown based on what you actually receive:
- Kimono dressing assistance is included (and tabi socks are included).
- Free baggage storage adds convenience.
- The photoshoot and the kimono rental/photography must be booked separately.
- The photoshoot output is substantial: up to 180 raw plus 18 edited.
So the price isn’t just for fabric and a quick outfit change. It’s paying for professional handling, plus the built-in routing and photography support that would be difficult to replicate on your own—especially when you’re trying to get classic shots around Kiyomizudera and Gion without wasting time.
If you skip the photoshoot, you should ask yourself whether you’re actually buying the kimono experience or buying the images. If images matter to you, the combo tends to make the cost feel more reasonable.
Who Should Book This (And Who Might Skip It)
This is a great fit if:
- You want photos that look like Kyoto fashion, not just vacation selfies.
- You’re visiting key Kyoto neighborhoods and want an easy plan for where to shoot.
- You like the idea of a lot of kimono options, including modern styles.
It may be less ideal if:
- You’re trying to book last minute for the photoshoot, since advance booking is required.
- You don’t want to plan around a strict 5:00 PM return for kimono items.
- You’re traveling with health concerns related to kimono wear. Pregnancy is strictly prohibited for safety, and you should not schedule it if that applies.
Should You Book This Kimono-and-Photoshoot Experience?
If your goal is to leave Kyoto with strong images and a day that feels guided, I think it’s worth booking—especially because the route is set around Gion + Kiyomizudera and because you get help dressing correctly.
I’d book sooner than later if you want the photography. Last-minute plans are the part most likely to change. Also, double-check your booking so you’re clear on what you’ve added: kimono dressing/experience is one part, and the photoshoot is another.
If you’re aiming for traditional street photos with a polished look, this is one of the cleanest ways to do it without turning your day into a logistics puzzle.
FAQ
Do I get the photoshoot automatically with the kimono rental?
No. The photoshoot service is offered exclusively to kimono rental/experience clients, but the rental experience and photography service need to be booked separately. Make sure you add the photography option to your plan.
How many photos do I receive if I book the photoshoot?
You can receive up to 180 raw photos and 18 edited shots.
Where is the meeting point for the kimono experience?
The start and end point is Okimono屋-清水店569-9 Shiraitochō, Higashiyama Ward, Kyoto, 605-0865, Japan.
What is included with the $127 kimono experience?
You get free baggage storage, free tabi-socks, and professional kimono dressing assistance. The kimono rental and photography service must be booked separately.
What is the return deadline for kimono items?
All items must be returned by 5:00 PM on the same day. Next-day return is available at no extra charge if you inform staff in advance.
Is kimono dressing allowed during pregnancy?
No. Wearing a kimono during pregnancy is strictly prohibited for safety. The provider asks that you do not disclose non-disclosure regarding health needs.