REVIEW · KYOTO
Let’s make only one original onigawara in the world
Book on Viator →Operated by 瓦工房you家 kawarakoubouyouya · Bookable on Viator
Make a Kyoto rooftop demon tile. In a max-five workshop at 瓦工房you家, you learn why onigawara faces guard Kyoto buildings, and you shape a tile in a small-group class that becomes a keepsake you can’t buy off a shelf.
I love the hands-on process: you start with clay, build a compact demon-face tile, and see everyone’s results come out a little different. I also love the cultural meaning—these scary-looking roof ornaments were used for protection, including guarding roofs from evil and rainwater.
The main consideration is timing and cost: your piece has to dry and be kiln-fired before it ships home, and shipping isn’t included in the experience fee.
In This Review
- Quick hits before you go
- Kyoto’s demon roof tiles, made in a real workshop
- Meet Yuya and the max-five class size that keeps it fun
- What you actually do: from clay lump to onigawara face
- The workshop flow, step by step
- The part you don’t rush: drying, kiln firing, then shipping home
- Price, value, and the shipping reality check
- The one cost to plan for
- Logistics in Kyoto: meeting point and getting there
- What to wear (and what to bring) so you’re not stressed
- Who this workshop is for (and who might want a different plan)
- Small-group means personal results (and that’s the whole point)
- Should you book this onigawara workshop?
- FAQ
- How long does the onigawara workshop take?
- How much does it cost?
- What’s included in the fee?
- Is an apron included?
- When will I receive my finished onigawara?
- Is this workshop beginner-friendly?
Quick hits before you go
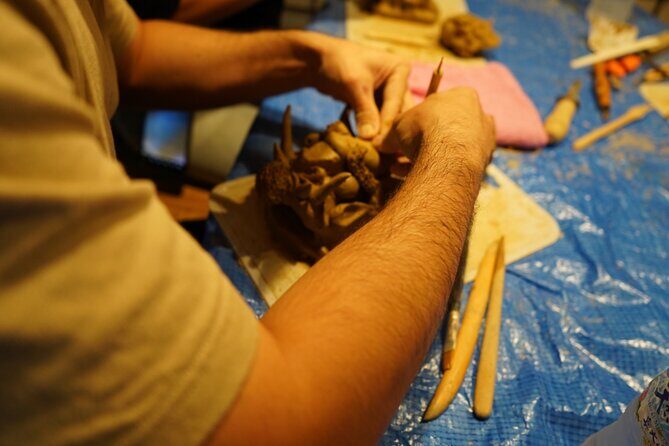
- Small-group coaching (max five): step-by-step help so you don’t feel lost with clay.
- Real onigawara purpose: you learn what these roof-end tiles were for, not just how to copy a face.
- Instructor-led kiln firing: your tile gets fired at the factory after you finish shaping.
- Plan for a wait: the process includes drying, firing, and then shipping to your home.
- Wear old clothes: the workshop uses soil, and you’ll likely get messy.
- Shipping is extra: you’ll pay shipping separately, so budget for it.
Kyoto’s demon roof tiles, made in a real workshop
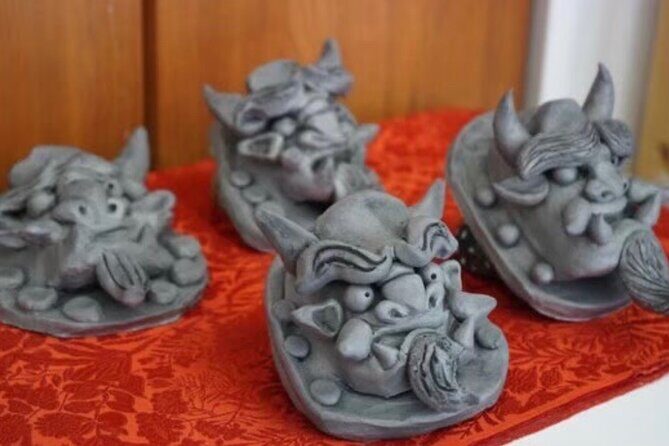
If you’re craving an authentic Kyoto souvenir, this is one of the few experiences that feels less like sightseeing and more like making something with your hands. You’ll create a small onigawara tile with a demon-like face—those iconic ogre roof ornaments you’ve probably seen perched on temple and shrine rooftops.
This workshop is run at 瓦工房you家, and the whole point is personal. You’re not collecting a mass-made trinket. You’re turning clay into a one-of-a-kind roof guardian—one original onigawara in the world, right there on your workbench.
You can also read our reviews of more tours and experiences in Kyoto.


Meet Yuya and the max-five class size that keeps it fun
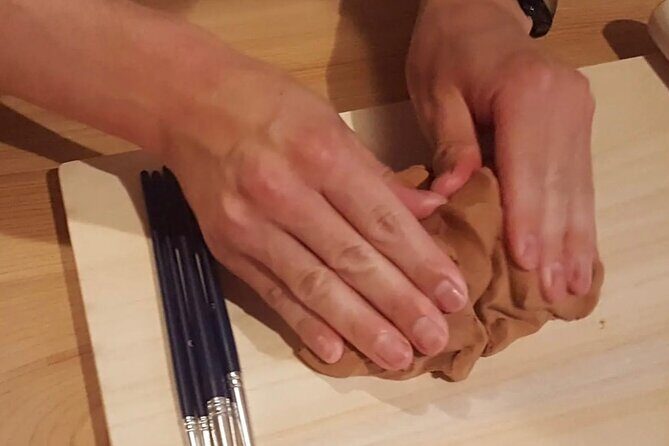
The class is designed for small groups, with a maximum of five people. That matters more than you’d think. When you’re working with clay, you need quick feedback—where to press, where to smooth, and how to keep your shape from collapsing before it sets.
The instructor in the workshop is often described as Yuya (and you may hear his guidance delivered clearly in English). People consistently highlight that the instructions are broken into manageable steps, which is a big deal if you’re a beginner or you’re the kind of person who usually ruins craft projects.
And because the group is tiny, you get time to ask questions. If you want to understand the why behind the technique—not just the how—you’ll have a better chance here than in larger classes.
What you actually do: from clay lump to onigawara face
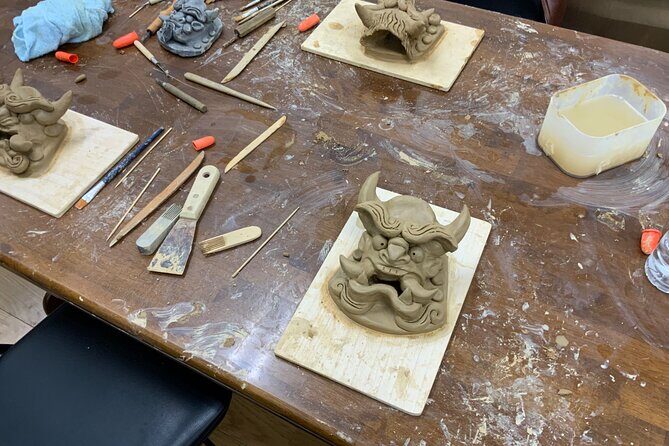
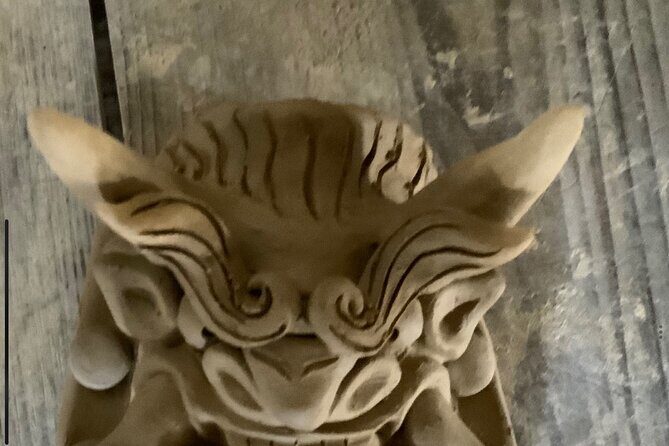
You’ll begin with the basics of onigawara as Japanese architecture ornamentation. Onigawara are the carved tiles placed at the ends of the main roof ridge line, traditionally used to help protect roofs from evil and rainwater. In other words: it’s not only decoration. It’s protective symbolism turned into roof hardware.
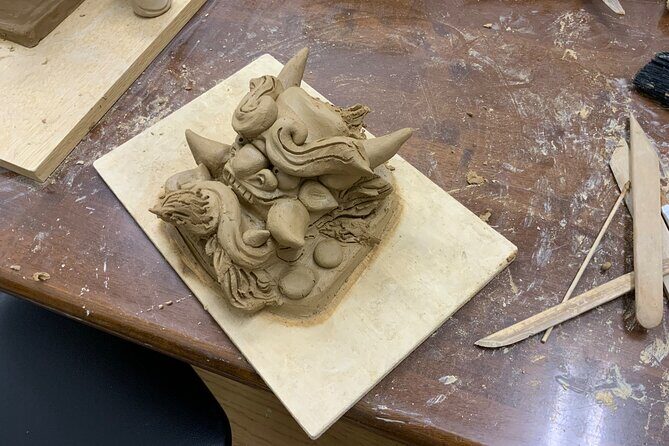
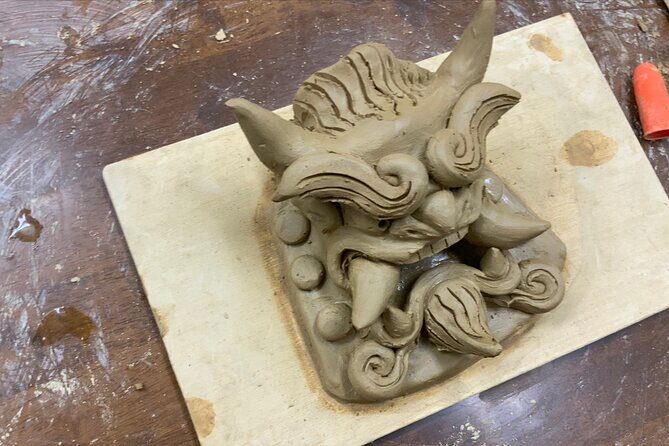
Then you move into the hands-on part: making a small, simple onigawara tile with a demon-face style. The workshop focuses on a procedure that makes an original oni achievable, even if you’re new to clay. The experience description specifically points out that onigawara are originally difficult, but the instructor uses his own developed approach to help you succeed.
The workshop flow, step by step
While details can vary a bit by group pace, expect a rhythm like this:
- Introduction and concept: why these roof-end tiles exist and what the demon design represents.
- Hands-on building: you assemble the tile form from scratch using a guided, piece-by-piece method.
- Personal shaping: you add your own twist to the face so it doesn’t look like everyone else’s.
- Finishing and handoff: once your shaping is done, the next stage happens outside the workshop—drying and kiln firing.
A useful mindset: your early version may look rough. That’s normal. The process is built for improvement across steps, not for instant perfection.
The part you don’t rush: drying, kiln firing, then shipping home
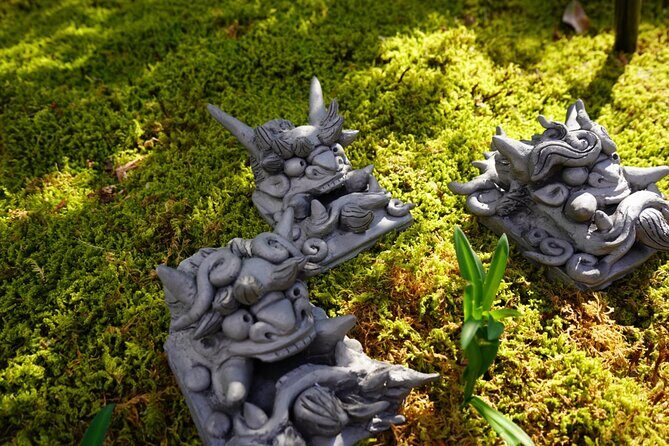
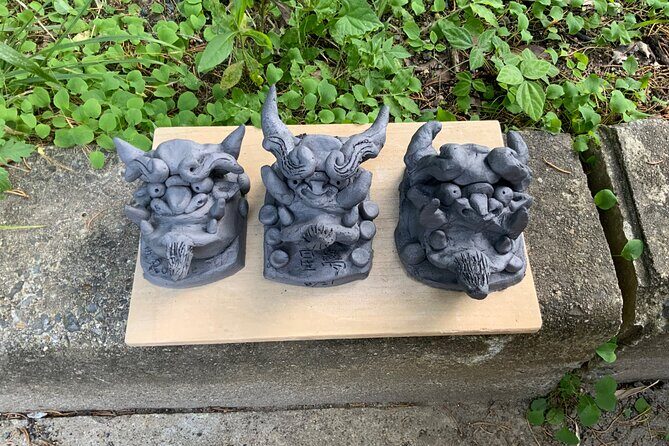
Your onigawara doesn’t become a finished souvenir the same day. After you shape your tile, the instructor fires it in a kiln at the factory. Then the clay needs time to dry and cure before shipping.
In practical terms, you should plan on waiting weeks—often around a month for drying—before your tile ends up at your home. Delivery timing can vary, but the point is the same: this souvenir is built to last, not to be rushed.
Once it’s ready, your piece gets shipped to you. The workshop ends back at the meeting point, but your onigawara’s story continues after you leave Kyoto.




Price, value, and the shipping reality check
The price is $89.17 per person, and it includes bottled water. The experience also mentions current discount pricing as part of the opening, plus group discounts, and you’ll get a mobile ticket.
Is it good value? I think so—if you treat it like a craft experience, not a quick photo stop. You’re paying for:
- expert guidance on a traditional design,
- kiln firing by the workshop/factory,
- and a one-of-a-kind outcome you can keep.
The one cost to plan for
Shipping costs are not included in the fee. Also, shipping is handled after class, so you’ll need to budget for it when the time comes. That’s the biggest gotcha for people who want the souvenir in hand immediately.
If you’re trying to pack light or don’t want to deal with ceramics in your luggage, shipping is actually a benefit. You’re letting the studio handle the delicate part.
Logistics in Kyoto: meeting point and getting there
The workshop start point is at 瓦工房you家 kawarakoubouyouya, 373-2 Yamazakichō, Higashiyama Ward, Kyoto, 605-0841, Japan. It’s near public transportation, which is helpful because Kyoto can make long walks feel like an endurance sport.
The session ends back at the meeting point, so you’re not starting a scavenger hunt across town.
Before you go, check what time slot you booked and arrive a little early. Clay workshops run on real human timing, not only clock time.
What to wear (and what to bring) so you’re not stressed
Because this experience uses soil, you should dress for mess. Wear clothes that you don’t mind getting dirty or dusty. An apron is not included (an apron is something you might already own, or you might prefer to wear a shirt you can sacrifice).
If you’re traveling with a bag of valuables, bring a tote or small bag you can keep close. People also mention having a place to store luggage during class, which makes it easier to focus on your tile instead of juggling your stuff.
Who this workshop is for (and who might want a different plan)
This is a strong fit if you:
- want a hands-on Kyoto activity beyond temples and markets,
- like ceramics or crafts, even if you’re not experienced,
- want a meaningful souvenir that feels personal.
It also works for families. The workshop description explicitly mentions that children can make an oni, and beginners with clumsy hands are addressed directly in the experience wording. That tells you the structure is forgiving—guided, step-by-step, and designed so you can finish.
It may be less ideal if you:
- need a souvenir you can carry out immediately,
- hate waiting for deliveries,
- get upset when a workshop takes longer than you expected (some classes can run over the listed time if you build carefully and follow instructions at a relaxed pace).
Small-group means personal results (and that’s the whole point)
One of the most satisfying parts of this experience is that everyone’s onigawara face ends up different. Even when you use the same overall approach, the details—eyes, shapes, and the face’s attitude—come out uniquely yours.
That’s exactly what you want when the goal is a one-of-a-kind tile. You’ll be able to look at your finished piece later and recognize your choices, not just the workshop’s template.
Should you book this onigawara workshop?
If you want a Kyoto souvenir that has real meaning and real craft behind it, I’d book it. The small-group size, the step-by-step process, and the fact that your tile is kiln-fired and shipped make it a convenient way to bring home something handmade without turning your suitcase into a ceramics disaster.
The only reason to hesitate is if you absolutely need the finished object in hand the same day or you don’t want to pay shipping later. If that’s you, consider a different souvenir option.
If you’re okay with the wait and want a hands-on cultural craft, this is one of those activities that feels quietly special long after you leave Kyoto.
FAQ
How long does the onigawara workshop take?
The experience is listed as about 2 hours.
How much does it cost?
The price is $89.17 per person.
What’s included in the fee?
Bottled water is included.
Is an apron included?
No. An apron (epiron) is not included.
When will I receive my finished onigawara?
Your tile is fired after you make it, and then it’s shipped to your home. The shipping cost is not included in the experience fee, so you’ll need to plan for that timing and extra expense.
Is this workshop beginner-friendly?
It’s designed so most people can participate, including children and people who may be clumsy with their hands. You’ll work through a step-by-step method to create a small onigawara tile.