REVIEW · KYOTO
Let’s make Japanese accessories with Mizuhiki
Book on Viator →Operated by Rakue · Bookable on Viator
Kyoto has a soft spot for string art. Mizuhiki turns thin paper cord into gifts, ornaments, and lucky knots you’ll use right after class. This one-hour workshop at RakueJapan is built around a simple idea: start with a basic knot and end with something you can actually wear or give.
What I like most is the step-by-step pacing and the teacher’s calm guidance. You’ll learn how to tie the Abalone knot, then apply it to a mini design you pick from the sample options. Second, I love the break at the end: you make, pause, and reset with matcha and sweets instead of feeling rushed.
One consideration: you’re relying on the materials and tools provided, and the “extras” you might want later (like specific mizuhiki for non-gift items and metal fittings) aren’t included if you want to recreate projects at home. If you want to keep crafting after the class, plan on sourcing those parts yourself.
In This Review
- Key highlights you should know
- Why this mizuhiki class is such a fun Kyoto stop
- Where you’ll meet RakueJapan (and how to not waste time)
- Your one-hour game plan: from poche bag to finished accessory
- Step 1: Pick colored paper for a mini poche bag
- Step 2: Tie the Abalone knot to the poche bag
- Step 3: Practice Abalone knots with just string
- Step 4: Choose from sample accessories
- Step 5: Select mizuhiki and build your accessory
- Step 6: Take a break with matcha and sweets
- What you’ll make: cute souvenirs with real Japanese technique
- Price and value: why $19.60 feels fair for this class
- Who this class fits best
- Practical tips before you go
- FAQ
- FAQ
- What is the duration of this mizuhiki workshop?
- Where is the meeting point in Kyoto?
- How much does the class cost?
- Is matcha and sweets included?
- What materials are included, and what is not?
- What can I expect to make?
- Do I need to bring anything?
- Is it a private activity?
- How accessible is it for beginners?
- Can I get a refund if my plans change?
- How far in advance should I book?
- Should you book this Kyoto mizuhiki class?
Key highlights you should know
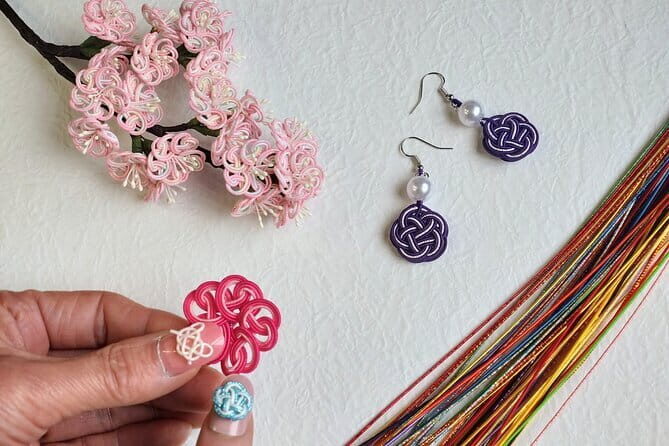
- Real mizuhiki, not a generic craft: you’re learning a tradition used for ceremonial and gift purposes.
- You start with a poche bag: colored paper goes into a mini bag base before the knot work.
- Abalone knot fundamentals first: practice with a simple string before you move to the full cord.
- Choose your accessory from samples: you’re not stuck making only one item.
- Matcha and sweets included: a proper mid-craft reset, not an afterthought.
- Private group feel: it’s your group only, so instruction can stay focused.
Why this mizuhiki class is such a fun Kyoto stop
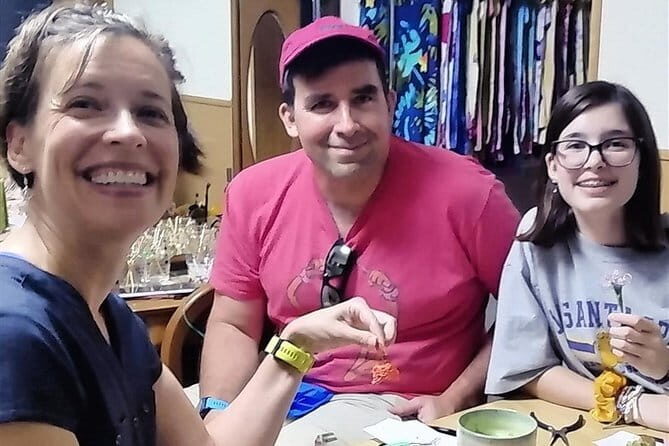
Mizuhiki looks fancy, but it’s built from plain things: thin twisted paper wrapped into cord and tied into knots. In Japan, these knots have long been part of gift-giving and special occasions. Even today, mizuhiki ties money gift envelopes and plays a role in rituals tied to sacred objects. So when you learn the knot here, you’re not just making something cute—you’re practicing a skill that has had a job in Japanese life for a long time.
The workshop at RakueJapan also matches Kyoto’s real travel rhythm. You can’t spend all day crafting, and you don’t want a lecture. This class is short (about 1 hour) and hands-on, with a structure that feels friendly even if your hands are usually better at eating than tying knots.
Most importantly, this is a value play. At $19.60 per person, you’re paying for:
- taught instruction (not just a craft kit),
- materials for the project,
- and a snack break with matcha and sweets.
That last part matters more than it sounds. A craft hour can be repetitive or tiring, and getting a sweet moment built in keeps you from leaving cranky.
You can also read our reviews of more tours and experiences in Kyoto.


Where you’ll meet RakueJapan (and how to not waste time)
You meet at RakueJapan, 600-8481 Kyoto, Shimogyo Ward, Shijōhorikawachō, 255 Nomura Building 2F. The location is described as near public transportation, which is the right kind of info for a one-hour class.
Because the workshop is short, you’ll want to treat arrival like you would a train connection: give yourself buffer time. The class ends back at the meeting point, so you don’t have to plan a second location or tack on extra travel.
Also note that the tour is mobile ticket based. That typically means less paper and less confusion when you arrive—just keep your phone charged and screen-ready.
Your one-hour game plan: from poche bag to finished accessory
The class follows a clear sequence. You’ll go from base construction to knot practice to a finished accessory you choose. Here’s how the flow works and why it’s designed well.
Step 1: Pick colored paper for a mini poche bag
First you choose colored papers to make a poche bag. This matters because it gives you a background that makes the knots pop. In photos (and real life), mizuhiki looks most impressive when the knot texture contrasts with the paper color.
It’s also an easy entry point. Before you touch the cord, you’re doing something tangible with the bag base. It helps even beginners start feeling successful quickly.
Step 2: Tie the Abalone knot to the poche bag
Next comes the core skill: tying the Abalone knot to the poche bag. The Abalone knot is a great “starter” knot because it’s recognizable and useful for multiple designs. Learning one foundational knot is better than jumping straight into something complex and getting stuck.
This part is also where the class earns its popularity. If you’ve ever tried to follow a knot diagram, you know how easy it is to go wrong. Here, you’re shown what to do and guided as you practice.




Step 3: Practice Abalone knots with just string
Then you repeat the knot with just a string. This step is smart. It lets your hands learn the movement without the added friction of working directly with your final materials. It’s the same idea as practicing guitar scales before the song.
If you tend to rush or get anxious when instructions are new, this practice segment is the stress reducer in the schedule. You get a few reps before it counts.
Step 4: Choose from sample accessories
After knot basics, you pick an accessory from the sample options. The workshop examples include things like:
- strawberry strap styles,
- floral hair ornaments,
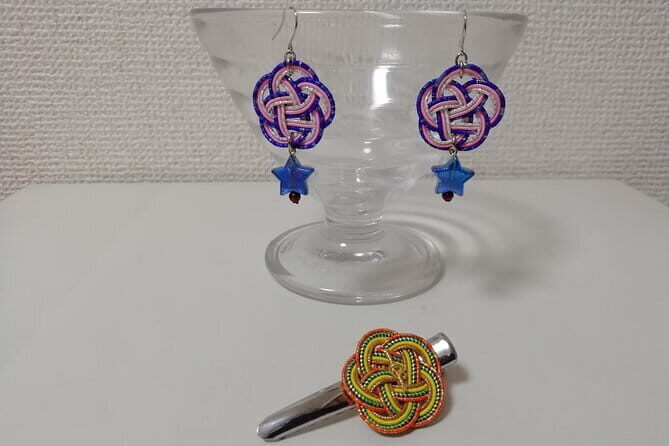
- cute earrings,
- mini baskets.
This choice is one of the best parts for your decision-making. You can match the craft to what you actually want to carry in your day-to-day travel life—like something you can wear immediately (earrings or hair ornaments) or something you can gift.
Step 5: Select mizuhiki and build your accessory
Now you select the mizuhiki you want and start assembling your chosen piece. This is where tradition meets personality. Mizuhiki can come in different colors, and the knot structure creates a texture that doesn’t look mass-produced.
In practical terms, this step is also where patience pays off. The class rhythm expects you to focus. That’s not a sales pitch—it’s simply how knot work goes. When you concentrate on loops and tension, you stop thinking about everything else for a while. That’s the real vacation benefit.
Step 6: Take a break with matcha and sweets
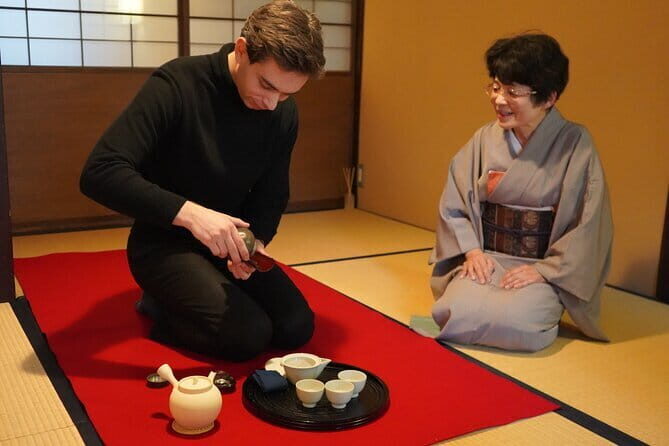
Finally, you pause and relax with matcha and sweets. For many craft classes, snacks feel like a quick apology. Here it’s built into the schedule, so you can actually reset after finishing.
It’s the kind of ending that helps you leave with energy instead of fatigue, especially if you’ve walked Kyoto all morning.
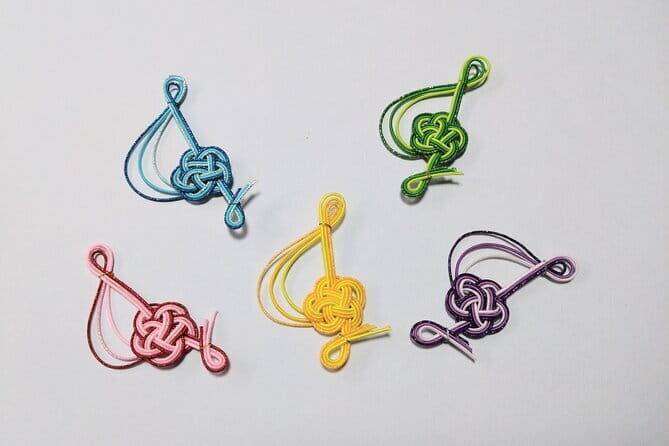
What you’ll make: cute souvenirs with real Japanese technique
The workshop is designed around souvenir results, but not the “everyone gets the same magnet” kind. Your finished items are meant to look like things you’d actually see sold in Kyoto, with knot texture and clean assembly.
If you’re shopping in Kyoto, you’ll recognize why these accessories sell: mizuhiki gives your souvenir a handmade surface you can’t fake with a print. The knot lines look crisp, and the color combinations look intentional even when you’re using guided steps.
A few things that come through strongly from the teaching approach:
- the knots are taught in a way that makes complicated-looking designs feel doable,
- instruction is gentle and encouraging,
- and the teacher is willing to slow down when hands need extra time.
If you’re a beginner, that’s huge. Knot crafts punish impatience. Good instruction prevents you from breaking the rhythm.
Price and value: why $19.60 feels fair for this class
At $19.60 per person, you’re not paying for a big tourist show. You’re paying for focused time with a real craft skill, plus materials and snacks.
Here’s the value math in plain terms:
- You get taught instruction, not just a craft assembly.
- Materials are included, so you don’t have to figure out what to buy.
- Matcha and sweets are included, which adds real comfort at the end.
- It’s short enough that you can fit it between sightseeing stops without losing half a day.
If you were to buy a similar accessory in a shop, you’d likely spend close to the same amount—sometimes more—without learning anything. This lets you leave with a souvenir and a skill you can repeat later (with extra supplies).
Who this class fits best
This is a great fit if you want:
- a hands-on cultural activity that isn’t physically hard,
- a short experience you can schedule during a busy Kyoto day,
- and a souvenir that feels personal.
The class says most travelers can participate. The private format helps too, because it’s your group only and instruction can stay tailored.
You’ll likely enjoy it most if you’re the type who likes small details—color choices, knot patterns, and tidy finishing. If you’re looking for big scenery or a museum-style story session, this isn’t that. This is mostly hands, focus, and craft.
Practical tips before you go
A few small prep ideas will make the hour smoother.
- Bring a sense of calm. Knot work is easier when you don’t rush.
- Wear comfortable sleeves. Your hands are working closely; loose, simple clothing helps.
- Plan your day around finishing. Because it’s about an hour, you’ll want to arrive early enough that you can start without stress.
- Take care of your piece afterward. You’ll have a small accessory you’ll want to keep intact while you move around town.
FAQ
FAQ
What is the duration of this mizuhiki workshop?
It’s about 1 hour.
Where is the meeting point in Kyoto?
You meet at RakueJapan, 600-8481 Kyoto, Shimogyo Ward, Shijōhorikawachō, 255 Nomura Building 2F.
How much does the class cost?
The price is $19.60 per person.
Is matcha and sweets included?
Yes. Snacks with matcha and sweets are included.
What materials are included, and what is not?
Materials are included. Mizuhiki for non-gift items and metal fittings for making them at home are not included.
What can I expect to make?
You’ll make a poche bag and tie the Abalone knot, then choose an accessory from samples such as strawberry strap-style items, floral hair ornaments, cute earrings, or mini baskets.
Do I need to bring anything?
The class provides materials. If you plan to make similar items at home afterward, you should expect that some items like non-gift mizuhiki and metal fittings are not provided.
Is it a private activity?
Yes. It’s private, so only your group will participate.
How accessible is it for beginners?
Most travelers can participate, and the format is designed to guide you step-by-step through the knots and accessory-making.
Can I get a refund if my plans change?
Yes—free cancellation is available. You can cancel up to 24 hours in advance for a full refund; within 24 hours, there’s no refund.
How far in advance should I book?
On average, it’s booked 38 days in advance, so booking ahead is smart if your dates are fixed.
Should you book this Kyoto mizuhiki class?
If you want a Kyoto souvenir that looks handmade and has a story behind it, I’d book it. The workshop’s strengths are the short, practical format and the way the knot basics are taught before you build your final accessory. The built-in break with matcha and sweets is also a strong finishing touch.
Skip it only if you’re looking for a long sightseeing-style outing or you want a hands-off experience. This one rewards attention. If you’re willing to slow down for an hour, you’ll leave with something you can wear, gift, and actually feel proud of.