REVIEW · KYOTO CRAFT WORKSHOPS
Kyoto: Sumi Ink and Brush Calligraphy Experience
Book on GetYourGuide →Operated by JEUGIA Corporation · Bookable on GetYourGuide
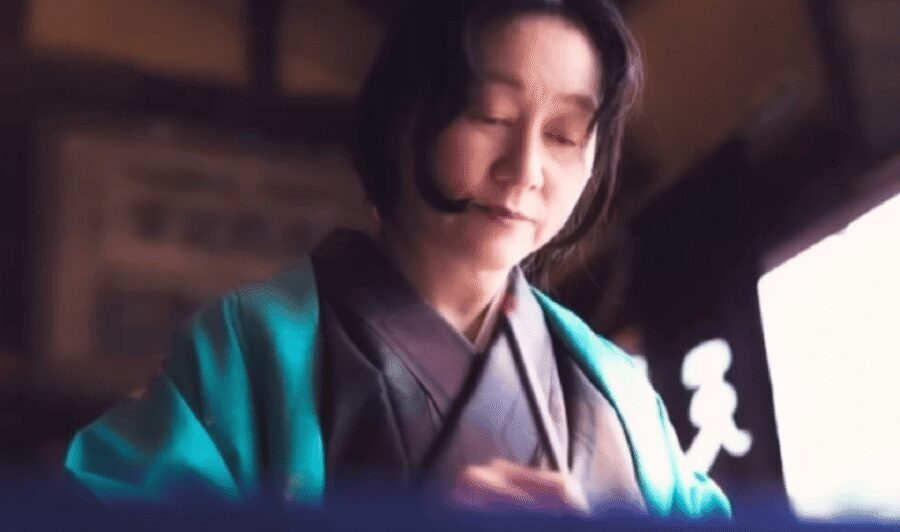
Ink, bamboo, and a calm rhythm in the middle of Kyoto. This sumi ink and brush calligraphy class focuses on doing the work yourself, from grinding the ink to writing your final characters. I like that it is hands-on and step-by-step, not a quick demo, and I especially like the take-home part: your finished shikisi board becomes a real souvenir you can display. The main thing to consider is the physical setup: the experience is listed as wheelchair accessible, but it also says it is not suitable for wheelchair users, so confirm before you go.
You’ll start by grinding sumi ink on an inkstone, then practice two core brush techniques: soku-hitsu (side of the brush) and choku-hitsu (upright brush). After that warm-up, you’ll draw bamboo on a shikisi board using water and ink, then add kanji next to it—specifically 竹 (bamboo) and 和 (harmony), with the chance to request other characters. The downside: you’ll want to arrive on time and dress for a slightly messy craft, even with an apron.
In This Review
- Key highlights you will actually use
- Grinding Sumi Ink Like a Mini Zen Ritual
- Brush Control: Soku-hitsu and Choku-hitsu Basics
- Painting Bamboo on a Shikisi Board Without Guesswork
- Adding 竹 and 和: Finishing Your Board with Kanji
- Price and Value: What $49 Gets You in Kyoto
- What to Expect in the Room: Timing, Groups, and Instruction
- Practical Tips: What to Bring for a Clean, Comfortable Session
- Should You Book This Sumi Ink Workshop?
- FAQ
- How long is the Kyoto sumi ink and brush calligraphy experience?
- How much does the experience cost?
- What is the meeting point near?
- Do I need prior calligraphy experience?
- What tools are included?
- Do I use pre-made sumi ink?
- Can I take my artwork home?
- What characters will I write during the session?
- What should I bring?
Key highlights you will actually use
- Grind your own sumi ink with water, so you control texture and color from scratch
- Practice two brush holds: soku-hitsu and choku-hitsu, before you paint bamboo
- Draw bamboo on a shikisi board, then write kanji beside it for a finished keepsake
- Small group (up to 6) with instruction in English and Japanese
- Take it home ready to display, so the class is not just a photo moment
- Patient, clear teaching with plenty of practice built in
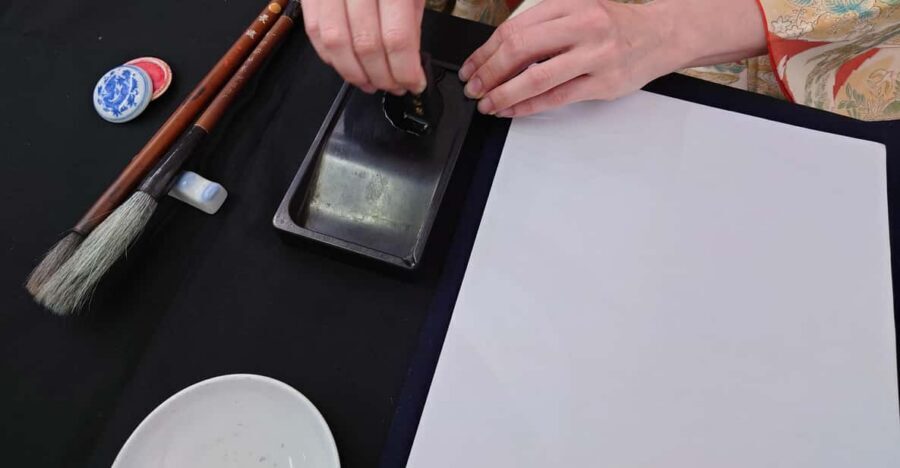
Grinding Sumi Ink Like a Mini Zen Ritual
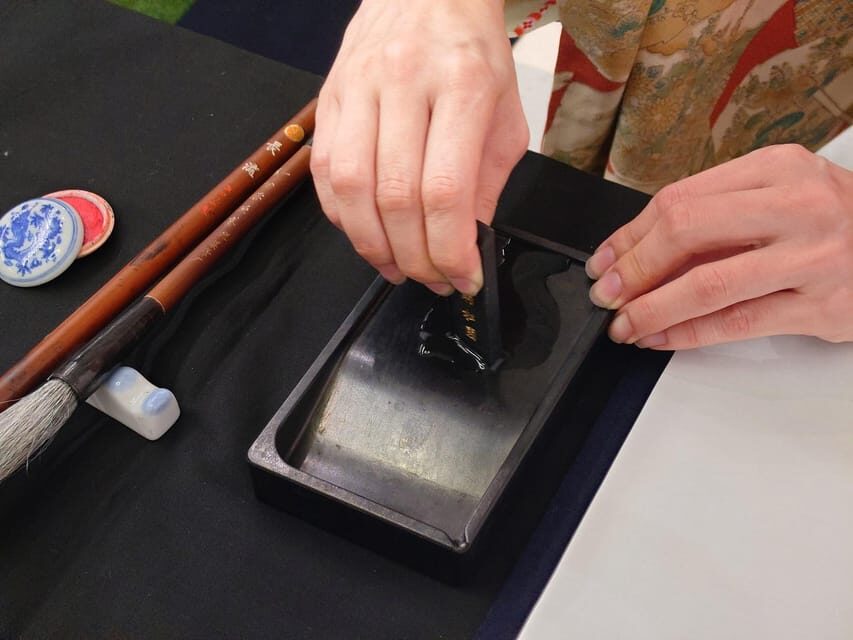
Kyoto can feel like it moves fast. This class slows the pace on purpose, starting with grinding sumi ink on an inkstone (suzuri). Instead of opening a jar of pre-made ink, you make it yourself with water, and that changes the whole feel of the session.
You’ll grind until the ink reaches the shade and consistency you need. The guide walks you through it, but the point is that you learn how the process shapes the result. I love this stage because it teaches patience without lectures. Your hands do the work, and you can actually notice the ink’s fragrance and the way it shifts in hue as it mixes.
One practical takeaway: you are not aiming for perfection. You are aiming for control. If the ink is lighter or darker than you expected, you’ll quickly understand why calligraphy looks the way it does. That mindset carries into the brush practice that comes next.
You can also read our reviews of more tours and experiences in Kyoto.


Brush Control: Soku-hitsu and Choku-hitsu Basics
Once the ink is ready, the class moves to brush technique. This is where most people get the most value for their time, because they learn how different brush angles change the line.
First comes soku-hitsu, where you use the side of the brush. This is usually the easiest way to start because it encourages smoother, wider strokes. Then you switch to choku-hitsu, with the brush held upright. Upright control is where the bamboo style starts to make sense—because bamboo doesn’t just have lines. It has rhythm, direction, and subtle pressure changes.
The teaching style matters here. The most praised part of the experience is how patient and communicative the instructor is, with step-by-step guidance and enough practice that you don’t feel rushed. I also like that you are not expected to know calligraphy terms ahead of time. You just follow the technique and repeat until it starts to click.
If you tend to get frustrated when something is hard, this part helps. There’s a clear progression: side-hold to upright-hold, then you apply that to actual bamboo. That structure makes it easier to judge improvement during the session, not just at the end.
Painting Bamboo on a Shikisi Board Without Guesswork
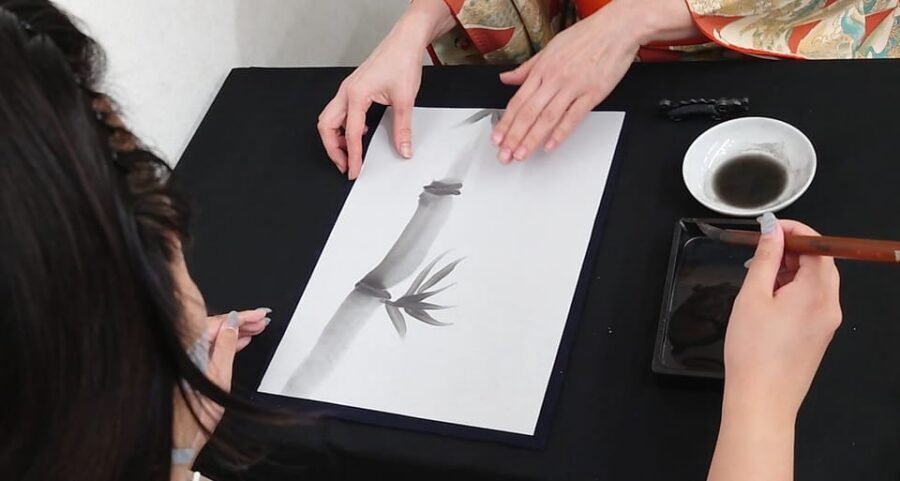
After brush warm-ups, you draw bamboo on a shikisi board. This is the moment when the class becomes a real art project instead of practice sheets.
You’ll use the techniques you practiced and apply them to bamboo. The instruction is focused on using water and ink only, which keeps the experience simple and traditional. The bamboo drawing is not about adding complicated decoration. It’s about getting the brush movement right, so your strokes feel confident and alive.
Why this matters for you: bamboo is a forgiving subject compared with, say, landscapes or detailed figures. Bamboo can look elegant even when you’re still learning. If your line quality improves during the session, it shows immediately on the board.
Another useful detail: you’ll likely draw on the shikisi board multiple times during learning. That repetition is part of the value. You’re not just producing one attempt. You’re building muscle memory, so your final version feels closer to what you intended.
The class is indoors, and it runs about 50 minutes, so you can expect a steady pace. The learning sequence is compact: grind, practice strokes, paint bamboo. That’s great if you want something meaningful but you still need time for sightseeing after.
Adding 竹 and 和: Finishing Your Board with Kanji
Your bamboo isn’t finished until you add the characters. Here, you’ll write kanji beside your bamboo. The standard characters are 竹 (bamboo) and 和 (harmony). If you want something different, you can tell the guide your request and they will write it for you.
This part is clever because it gives you a ready-made theme. You’re not stuck trying to choose a design. You’re contributing to a composition that already has meaning. And if you do request another character, it can turn your board into something more personal.
I also like the way this final step completes the learning loop. You start with an ink process, then brush techniques, then a subject, then language. By the end, you’ve touched the three core ingredients of sumi ink work: ink, line, and character.
The finished shikisi board is yours to take home. That means you can treat the session like a souvenir that lasts longer than a postcard. It also makes it easier to justify spending time on something slower than a temple hop, because you’re leaving with an object, not just an experience.
Price and Value: What $49 Gets You in Kyoto
At $49 per person for about 50 minutes, this isn’t the cheapest thing on the map. But it’s also not trying to be. The value comes from a few specific things you can’t really replicate as easily on your own.
First, the class includes the tools you need: the inkstone (suzuri), the shikisi board, and guidance on technique and bamboo drawing. Second, you’re not buying pre-made ink or sorting out how to use an unfamiliar setup. Someone teaches the basics in the room, then helps you practice.
Third, you walk out with a completed board. That makes the cost feel more like a craft session than a ticket to a performance. You can display your artwork, which turns the price from “a fee” into “a product you made.”
Is it worth it if you only want a quick taste? Maybe not. But if you like hands-on workshops and you want a Kyoto memory you can actually hang on a wall, it’s a strong value.


What to Expect in the Room: Timing, Groups, and Instruction
This is a small group class limited to 6 participants. That matters because calligraphy is all about feedback, even when the feedback is simple: where your brush touches, how pressure changes, how the angle affects the stroke.
Instruction is available in English and Japanese, and the session includes guidance on brush techniques and drawing bamboo. The reviews you’ll see for this kind of class tend to praise the teaching approach—patient coaching, clear communication, and plenty of practice time—so you should expect a calm learning environment rather than a “watch and leave” format.
You’ll want to arrive on time. The total duration is tight, and the learning sequence relies on keeping the ink and practice flow moving. If you’re late, you’ll lose the continuity from grinding to bamboo to finishing characters.
Practical Tips: What to Bring for a Clean, Comfortable Session
Even with an apron, think craft-day, not suit-day. The experience is indoors and you’ll be working with ink and water, so you should dress accordingly.
Bring:
- Comfortable shoes
- A hat and sunscreen if you have outdoor time before or after (Kyoto sun can be intense)
- Water
- Comfortable clothes
You’ll be given an apron so your clothes don’t get dirty. I still recommend wearing something you don’t mind getting stained if a drop happens. Ink can be stubborn, and even careful people have accidents.
Also, plan your day around the meeting point. The class meets near the giant crab sculpture of Kani Doraku. That’s a helpful landmark because Kyoto has lots of small streets and side entrances. Use it to confirm you’re in the right area before you step into the venue.
Finally, if you’re bringing photos as references for other things in Kyoto, don’t worry. This class does not require prior calligraphy experience. The point is to start from zero and build skills during the workshop.
Should You Book This Sumi Ink Workshop?
Book it if you want a structured, hands-on Kyoto activity with a real takeaway. This class is best when you like slow craft moments: grinding ink, practicing brush control, then drawing bamboo you made with your own hands. It’s also ideal if you enjoy workshops where instruction is clear and patient, because the session is designed around repeated practice.
Skip it (or at least confirm details first) if you only want a quick photo stop or if you have concerns about the physical setup. The information you’ll see includes both wheelchair accessibility and a note that it is not suitable for wheelchair users, so check directly with the provider before assuming access will work. Also, if you hate messy materials entirely, ink and water may not match your comfort level even with an apron.
If you’re the type of traveler who likes learning one traditional skill during a trip and taking home an object that proves you were there, this is an easy “yes” from me.
FAQ
How long is the Kyoto sumi ink and brush calligraphy experience?
It lasts about 50 minutes.
How much does the experience cost?
The price is $49 per person.
What is the meeting point near?
It is near the giant crab sculpture called Kani Doraku.
Do I need prior calligraphy experience?
No prior experience is required.
What tools are included?
You get all necessary tools for calligraphy, including an inkstone (suzuri) and a shikisi board.
Do I use pre-made sumi ink?
No. Pre-made sumi ink is not included, so you grind sumi ink yourself with water.
Can I take my artwork home?
Yes. You can take home your finished shikisi board.
What characters will I write during the session?
The standard characters are 竹 (bamboo) and 和 (harmony), and you can request other characters—your guide will write them for you.
What should I bring?
Wear comfortable clothes and shoes. Bring a hat, sunscreen, and water. An apron is provided to help protect your clothes.